 In previous installments of this column, we looked at some methods for cutting brass and techniques for bending brass for your automaton projects. At some point, you will want to join some of these pieces without the use of screws, bolts, or other hardware. In this, the final installment of our series on working with brass, we will look at some tools and techniques to solder brass parts together.
Soldering Tools and Materials
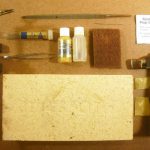
Here are the tools and materials that I used for this article:
- Tix brand solder
- Tix brand flux
- Butane soldering torch
- Fire bricks
- Third-hand tool
- Tweezers
- Hammer
- Metal file
- Brass pieces
- Abrasive pad
- Alcohol swab
Types of Solder and Flux
There are many types of solder and I encourage you to experiment with all of them. For now, we are going to use a soft solder that goes by the brand name of Tix. It is a product used by many hobbyists and clock repairers. Tix is a soft solder with a low melting point. This is important because high temperatures can cause the brass to discolor or become soft via process called annealing.
Principles for Successful Soldering
There are some general principles that apply to almost every type of soldering. Follow these rules and your chances of success are greatly improved.
The parts should fit together well
Solder acts a bit like glue. Alone, it’s not terribly strong, but it is capable of holding two pieces together quite well. Do do this, the two pieces to be joined should share as much surface area as possible. Don’t expect the solder to be strong if it is filling big gaps between the parts.
The parts must be clean
The strength of the solder bond will depend on the mating surfaces being very clean.
The parts should be held in place during the soldering operation
During the process of soldering, the parts should be held still and firmly.
The parts should be heated, not the solder itself
This is one of the most misunderstood aspects of soldering. You don’t melt the solder itself. You heat both of the parts to be joined until they reach the melting point of the solder. Then, the solder flows toward the heated area and into seams via capillary action.
Soldering is Largely about Preparation
When soldering any given joint, about 98% of your time will be spent getting ready to solder, so don’t rush or neglect any aspect of the task.
Soldering Brass Step-By-Step
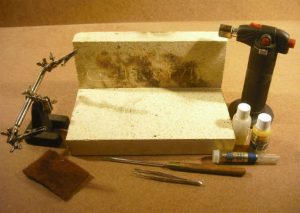 Step 0: Prepare Your Workspace
A safe work area is essential. Remove any flammable materials from the area. Work in a well ventilated area, or use a small fan to blow soldering fumes away. I use fire brick to create a safe surface for soldering. I often use two bricks, standing one up behind another one sitting flat. This creates a barrier for the flame and can serve as a reflector off of which to bounce the heat from a torch.
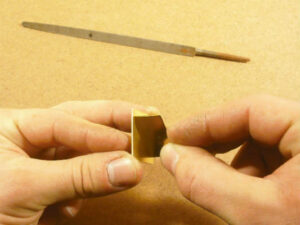 Step 1: Form the Pieces to be Joined
Shape your pieces to fit together. This will require time spent with cutting tools and files, making sure that the parts fit together very well. When held up to a light source, you shouldn’t be able to see gaps between your pieces. A mechanical connection used in conjunction with soldering is always a good idea where strength is required. Can the parts be notched to fit into one another? Consider various ways to add a mechanical connection to your joint.
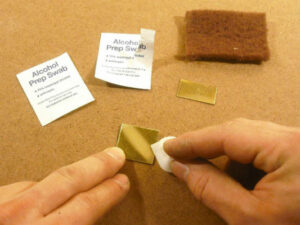 Step 2: Clean the Surfaces
Use a file, sandpaper, emery cloth, Scotch-brite pads, or steel wool to clean the surfaces to be soldered. A fiberglass scratch brush is good for cleaning hard-to-reach areas. Note that some brass is coated with a clear lacquer to keep it bright. This must be removed if the solder is to adhere. Once the parts have been scoured, they should then be cleaned with alcohol to remove any fine particles or oils. When you are done with it, remove the alcohol from your work area and allow the pieces to dry completely.
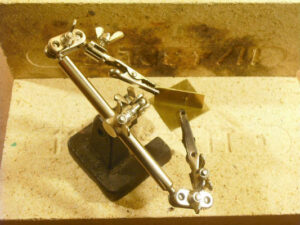 Step 3: Position Your Parts
Use clamps or wire to hold things together. Tall T-pins can be pushed into the soft type of fire brick to hold the parts in position. Heavy metallic objects can also be used to hold parts down and together. Bear in mind, that these objects will get very hot. If placed too close to the joint, they may absorb the heat you are trying to apply to the joint.
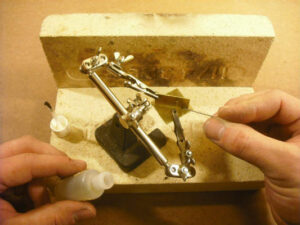 Step 4: Apply the Flux
Tix solder has a companion flux, which is a clear liquid. Tix flux comes in a bottle with a brush. The brush tends to dispense far too much flux and in the wrong places. Solder will have a strong tendency to flow anywhere the flux has been applied. If you want a tidy solder joint, use a thin wire to apply small amounts of flux exactly where you want it. When a small droplet is applied to a joint, capillary action should pull the liquid between the two pieces. Sometimes it’s easier to apply flux before positioning your pieces together. Tix also makes an anti-flux, which can be painted anywhere you really don’t want solder to go.
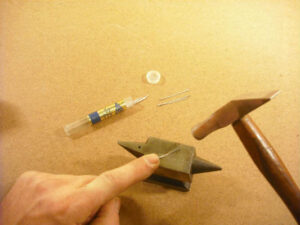 Step 5: Prepare and Apply the Solder
Whenever possible, I like to place pieces of solder on the parts. The amount and position of solder is easy to control, and nothing is touched during the operation. Round solder wire is often too thick and prone to roll off your parts. For this reason, I use a hammer to pound the solder wire flat. You’ll be surprised how much solder you save by using these thin strips. Cut a small piece from the flattened portion and use tweezers to place the solder directly onto the seam you intend to bond. Finally, drop a bit of flux on the solder. Don’t get the flux onto any of your good tools! It’s corrosive.
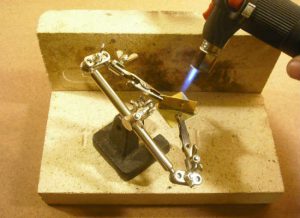 Step 6: Apply Heat
Solder will flow toward the heat created with the torch. Use this to your advantage. If possible, heat the pieces from the side opposite to where you have placed the solder. This way solder is drawn into the seam between the two parts.
Start your torch and turn the flame down to a low setting. Begin to heat the pieces.
Heating both parts to reach the same temperature at the same time can be tricky, especially if one has more mass than the other. The time spent with the torch directed at each piece should be proportional to the mass of each piece. If you are soldering a thick solid piece to a piece of thin sheet or tubing, the solid piece will need more heat. Keep the flame moving, spending more time on the larger piece, moving briefly to the smaller one, and back again.
The moment the parts reach the critical temperature, the solder will ‘flow’ in an instant, spreading into the seam and any adjacent areas where there may be flux. The flowing solder will appear to collapse into the joint and shimmer. Immediately withdraw the flame. Additional heat won’t help much at this point.
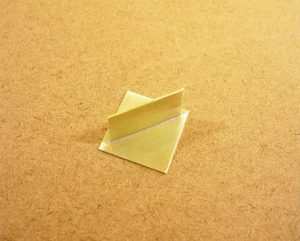 Step 7: Allow to Cool, Rinse, and Clean
Allowing the solder a few minutes to cool might not seem like a step. I regard it as one because, too many times, I’ve moved the pieces before the solder has set. Once it has cooled, rinse the part well under running water to remove any residual flux. Dry your part and clean off any excess solder. If you were careful, there shouldn’t be much. I keep a few old files around specifically for this purpose. You don’t want to ruin your good files by clogging them up with solder.
As with so many subjects covered in this column, we’ve only scratched the surface. Preparation and practice are the keys to soldering well, so…prepare to practice!
 Dug’s Automata Tips, Techniques and Tricks
A quarterly column by automaton-maker and enthusiast Dug North
Copyright 2015 Dug North
Warning: The topics covered in this column include the use of tools and materials that have the potential to cause damage to property and/or bodily injury. Your safety is important and it is your sole responsibility. Always read and follow the safety instructions that come with tools and materials you use. Wear safety glasses, use guards and other forms of safety equipment, follow safety precautions, and use good judgment. Seek the guidance of experienced outside sources whenever required.
Further Reading
Simple Soldering: A Beginner’s Guide to Jewelry Making: Amazon UK – Amazon US
Soldering and Brazing (Workshop Practice Series): Amazon UK – Amazon US
Materials
Brass Rod: Amazon UK – Amazon US
Brass Tubing: Amazon UK – Amazon US
Brass Sheet: Amazon UK – Amazon US
Tools
Soldering Torch: Amazon UK – Amazon US
Tix Solder: Amazon US
Tix Flux: Amazon US
Tix Anti-Flux: Amazon US
Fire Bricks: Amazon US

Leave a Reply