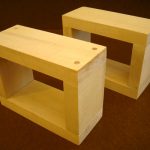
 Building the Boxes for Wood Automata
There is no rule that says the mechanism for a wood automaton must be contained inside of a box, but the practice does have some advantages. A box makes a sturdy base, provides even surfaces for mounting mechanisms and figures, and can make the construction process easier. While there are dozens of sophisticated woodworking joints, a basic one will do the trick!
The Corner Butt Joint
The most straightforward wood joint is the corner butt joint, also called the end-to-face joint. As the name implies, the end of one board is butted up against the face of another to form a corner. This joint is easy to make because it does not require any intricate cuts in the wood. However, because the boards themselves are not locked together in any mechanical way, the butt joint relies on glue, fasteners, or reinforcement for its strength.
Doweling for Strength
Drilling holes and inserting dowels into them is a simple and effective way to make butt joints stronger. This method doesn’t require any specialized tools. Best of all, the dowels are often enough to hold the box together, making it easy to assemble and disassemble. There are two main approaches to using dowels to reinforce a joint: through-doweling and blind-doweling. First, we need to consider the dowels or dowel pins as they are often called.
 Selecting the Dowels
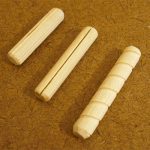
Choose dowels that have a diameter that is about half the thickness of the boards used for the box. The length of the dowel should be about 5 times its diameter. For example, 1/4″ diameter dowels used to join 1/2″ boards should be about 1-1/4″ long. Commercially made dowel pins come with straight or spiral grooves cut in their sides. These grooves allow excess glue to escape when the dowel pin is driven into a hole.
Through-Doweling
Through-doweling is one method of using dowels to hold wood pieces together at a right angle. It is called ‘through-doweling’ because the face of one of the boards is drilled all the way through.
 Step 1 – Select a Drill Bit
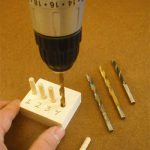
Select a drill bit that is the same size as the dowel pins. If you have more than one drill bit of the correct size, drill a hole in some scrap wood with each bit and insert dowels into the holes. Use the bit that creates a firm friction fit for the dowel.
 Step 2 – Mark the Dowel Locations
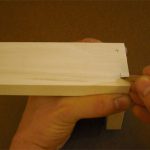
Once the pieces of the box are cut to length, mark the locations for the dowels. The dowels should be located in the middle of the upright box sides. Use two or three dowels per corner depending on the width of the box.
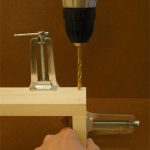 Step 3 – Drill the Holes
Drill through the face of one board into the end-grain of the box side. Keep the drill perpendicular to the face of the first board and parallel to the second. Use a vise or corner clamp to keep the boards aligned and at 90 degrees to each other.
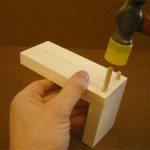 Step 4 – Insert the Dowels
If you have made your own dowel pins, bevel the ends slightly with a knife or pencil sharpener to make them easier to install. Tap the dowel pins into the holes with a small mallet. Don’t use glue at this time.
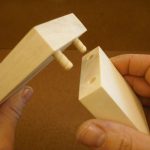 Step 5 – Assemble the Joint
Line the dowels up with the holes and fit the pieces together. Use a small mallet to tap the joint closed if necessary.
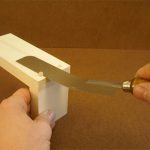 Step 6 – Trim and Sand the Dowels Flush
Any excess dowel can be trimmed with a small saw and sanded flush with the surface of the box. Repeat this process for all four corners of the box. When the automaton is complete, the dowels can be glued into place.
Blind-Doweling
Blind-Doweling is similar to through-doweling but the dowels are hidden because they do not protrude through the top and bottom faces of the box.
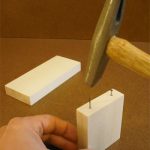 Step 1 – Tap Nails into the End the Box Side Piece
Tap small nails into the end of a box side piece where you intend to install the dowels. Don’t place the nails too close to the edges of the board. They might weaken it.
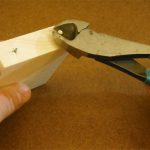 Step 2 – Trim the Nails
Snip the heads off of the nails with wire cutters so that about 1/8″ remains. Straighten any bent nails with a pair of needle-nose pliers.
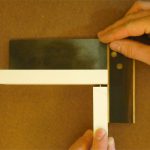 Step 3 – Mark the Dowel Locations
On a flat surface, use a square to align the pieces at 90 degrees. Press the boards together so that the board with the nails creates small indentations in surface of the second board. These marks are where the dowel holes will be located.
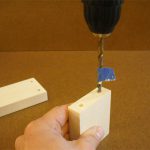 Step 4 – Drill the Holes
Unlike through-doweling, each blind dowel will require two separate drilling operations. Drill holes in the locations marked by the nails. Don’t drill all the way through the board this time! Use a piece of masking tape to keep from drilling too deeply. Pull the nails out of the box side with pliers and drill holes in those locations too. The holes in the side pieces can be deeper than those in the board faces.
 Step 5 – Install the Dowels
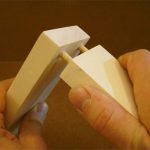
Tap dowel pins into the holes and try fitting the boards together. If the joint will not close all the way, the dowels are probably too long. Trim or sand them down. Repeat this process for the other corners of the box. When the automaton is finalized, all of the dowels may be glued in place.
Though it doesn’t involve any complicated woodworking techniques, butt joints reinforced with dowels are more than strong enough for wood automata. The process doesn’t require many tools, though there are a few that make the process even easier (check out the resources section for some suggestions). The great benefit of this technique is that the dowels alone can hold a box together while you refine the design of your automaton. Being able to quickly assemble and disassemble the box will save you a lot of time and effort!
For a list of materials and further reading visit Dug’s Tools and References page.
 Dug’s Automata Tips, Techniques and Tricks
A quarterly column by automata-maker and enthusiast Dug North
Copyright 2012 Dug North
Warning: The topics covered in this column include the use of tools and materials that have the potential to cause damage to property and/or bodily injury. Your safety is important and it is your sole responsibility. Always read and follow the safety instructions that come with tools and materials you use. Wear safety glasses, use guards and other forms of safety equipment, follow safety precautions, and use good judgment. Seek the guidance of experienced outside sources whenever required.

Thanks a lot Dug !
great number 7 tips and tricks!
Thank you Marie-Reine! I am glad you like it.
I like it as I have unlimited trees and am not so keen on nails. Its a bit like green woodworking. Also less complicated than dovetails. Can’t you do this monthly…..
Glad you liked the article Laurel! Doweling is a simple strong solution that doesn’t require a lot of tricky cuts or fancy tools. Dovetails are beautiful and strong, but take a long time to master. Monthly? I’m flattered you would suggest it.
I really enjoyed watching your videos of you in your workshop and the success you have had with Hugo. I am new to this and finding your website and Cabaret Mechanical Theatre a blessing. Kazu Harada was the first of the group that I saw on Japanese TV. I am hoping to develop my skills in making Automata to share with my art community in Lancaster Pa.
Thank You -T.R.Hart
Thanks T.R.! Glad you enjoy the videos and the ‘Hugo’ documentary. Kazu Harada makes great automata. Best of luck building your skills and sharing your art! Perhaps you can get some mechanical inspiration from the National Watch and Clock Museum in nearby Columbia, PA.
All the best,
-Dug
Dug, thanks for these tips, they are fabulous. I am a primary school teacher who teaches automata as one of my projects to Year 4 children. The doweling looks a lot easier to teach than I thought it would be. I have been gluing the inner and outer corners with a piece of card, which works, but doesn’t look that good. The dowels are much ‘cleaner’ and stronger.
Paul
Paul,
You are very welcome! I think you will find that the doweling — especially the through-doweling method — to be fairly easy. It should also provide more rigidity to your boxes which will help things run better. Best of luck!
-Dug
Working with the box!
http://instagram.com/p/gBk456tfiM/