 Making Urethane Belts for Automaton Projects
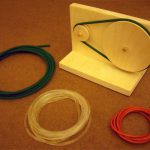
In the last article, we looked at how to make pulleys for automaton projects. We also made belts from O-ring gasket material. Custom-sized belts can also be made from urethane belting material. Joining the ends of this material is one of those jobs that seems to require three or four hands, but it doesn’t have to. Let’s take a look at an easy method that produces a strong welded joint.
 What You Will Need
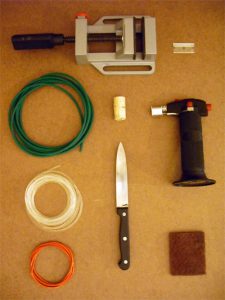
This project requires urethane belting material, some tools, and a torch
Materials
A length of urethane belting suitable for your automaton project
Cork from a wine bottle
Tools
- Small vise
- Butane micro torch
- Kitchen knife
- Abrasive cleaning pad such as Scotch-brite
- Single-edged razor blade
- Small flush cutting pliers (optional)
This project is all about the tools, materials, and preparation. With that in mind, let’s take a look the most important components.
 Urethane Belting Material
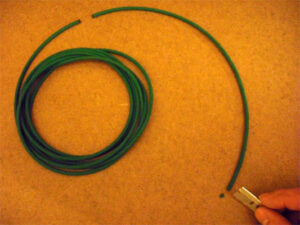
Urethane belting material is sold by the foot, so you must connect ends of pieces to make the circle you need. Fractional inch diameters are clear or orange in color. The metric sizes come in green. The clear and orange varieties are smooth, while the green has a fine textured surface. For most automaton projects, either type will work fine. Unless you are making a large piece, you’ll probably want to use the smaller diameters offered, such as 3/32″ and 2mm. Both of these sizes are rated for a minimum pulley diameter of 3/4″ (about 19cm). Use a single-edge razor blade to cut the belting to length, making sure the ends are flat and square.
 The Knife
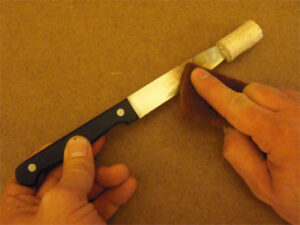
To weld the belt, the ends must be melted. To keep the ends flat as they melt, we will press them onto a hot piece of metal. I use an old kitchen knife that I’ve dedicate to this purpose. The knife should have a flat steel blade and a handle with flat sides that can be held securely in a vise. I’ve covered the tip of the blade with the cork from a wine bottle for safety. The tip could also be ground off. The knife works well, but any thin piece of steel that can be mounted in the vise will also suffice. The metal should be cleaned before each welding operation. Scrape off any residue left over from previous use, and scrub both sides with an abrasive cleaning pad.
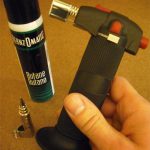 The Micro Torch
To heat the knife, I use a small butane torch because it produces a clean, hot flame, and stands on its own at a suitable height. These torches are also handy for soldering metals. A candle or alcohol lamp can be used instead of the torch, but it will take longer to heat the metal to the proper temperature. The melting urethane will give off some fumes that are best not to breathe, so be sure to do this in a well-ventilated area or outside.
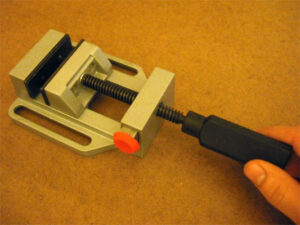 Vise
Vise
Any type of vise that can rest on or be mounted to a table will do. Mine is meant to be used in conjunction with a pillar drill (drill press). The vise will be one of those extra hands you need for the job.
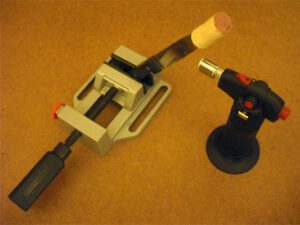 Set Up for Welding the Belt
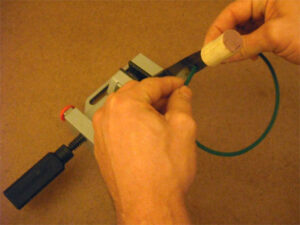
Collect all of the tools and supplies and place them on a workbench or table. I recommend sitting down for the task. This allows you to rest your arms on the table for stability. Clamp the knife handle in the vise so that a portion of the blade is at the same height as the torch. With your arms or elbows resting on the table, position the vise so that the knife is located near your hands. Direct the micro torch away from you, centered on the edge of the knife blade. Place your soon-to-be belt on the table between the vise and the knife.
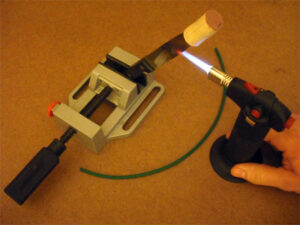 Heat the Knife
Start the butane torch and direct the flame straight at the edge of the knife blade. It only takes about 15 seconds for this part of the flame to heat up my knife sufficiently. If your knife is larger or smaller it may take more or less time. The metal is hot enough when the very edge of the blade starts to glow orange. Don’t expect the metal to turn orange if you are using a candle as the heat source. When the metal is hot, turn the torch off and place it well out of the way.
 Fuse the Belt
Grip the belt ends about 1/2 inch (or 12cm) from each end, one in each hand. Bring the two ends toward the blade so that their ends will touch the surface squarely on either side. The belt ends should be a mirror image of each other during this process. Apply a little pressure as if pressing the ends together through the metal. You will immediately see and feel the ends of the belt start to melt and splay out, forming a ring or a trumpet-like shape. This tells you the ends have melted all the way through to the core of the belting.Immediately after you have seen the belt ends spread out, keep them pressed against the metal and carefully slide them in unison toward the edge of the blade. Continue to slide the ends until they are completely off the blade and touch end-to-end. You have just a second or two — no more — to slide the ends slightly so that they are in perfect alignment. Continue to lightly press the ends together. Now hold still and count to 100.
 Inspect the Belt and Let it Cool
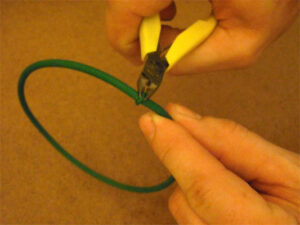
After you are done counting, inspect the weld. It may look pretty ugly with a lot of extra plastic around the joint. We will deal with that in moment. Check that the belt forms a smooth, continuous curved form. If there is a big offset step where one end meets the other, you may want to cut the belt apart and start again. If it looks good, place the belt on the table and leave it alone for 20 minutes.
 Trimming the Welded Joint
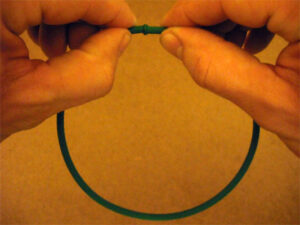
The last thing to do is trim any extra melted belt material off of the newly welded joint. The easiest method I’ve found is to use a pair of flush cutting pliers, normally used to cut wire. Use the pliers to nip off the excess material, being careful not to accidentally cut into the belt itself.If you are careful, you can also use a single-edged razor blade. Straighten out the belt on a protected flat surface. Hold the razor blade parallel to the belt and slice away the material that is outside of the belt’s true diameter.One last approach advocated by some is to grind the excess material off with a coarse wheel on bench grinder. This method works, but it’s not without its risks. As a rule, you should keep any form of loose material such as clothing, hair, and jewelry away from spinning machinery. A wise person might consider belts to fall into this category too.
 Dug’s Automata Tips, Techniques and Tricks
A quarterly column by automaton-maker and enthusiast Dug North
Copyright 2013 Dug North
Warning: The topics covered in this column include the use of tools and materials that have the potential to cause damage to property and/or bodily injury. Your safety is important and it is your sole responsibility. Always read and follow the safety instructions that come with tools and materials you use. Wear safety glasses, use guards and other forms of safety equipment, follow safety precautions, and use good judgment. Seek the guidance of experienced outside sources whenever required.
Sources
Osborne, Albert H. (1973) Welding Plastic Belts. Bulletin of the National Association of Watch and Clock Collectors, 15(165), 1347-1348.
Perkins, Archie B. (1982) How to Use the Modern Watchmaker’s Lathe Part III, Horological Times, November, 23 and 37.
Tope, John (Producer). (2005) Clockmaker Watchmaker Lathe Basics [DVD]. United States: Tick Tock Productions.
Materials
 Urethane Round Belting, 1/8 inch, 10 ft Length, Orange Amazon US
Urethane Round Belting, 1/8 inch, 10 ft Length, Clear Amazon US
Urethane Round Belting, 2mm, 10 ft Length, Green Amazon US
Tools
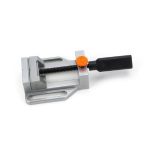 Small vise: Amazon UK – Amazon US
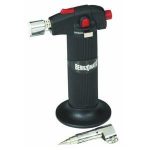 Butane Micro Torch: Amazon UK – Amazon US
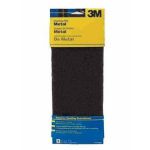 Abrasive cleaning pad such as Scotch-brite: Amazon UK – Amazon US
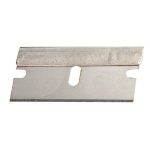 Single-edged razor blade:
 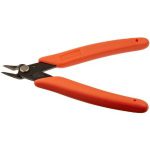 Flush cutting pliers:
We use these belts a lot in the automation industry. They have good stretch, and last forever. They make splicing kits that make the job very easy, but they are very expensive. You can seem one here http://www.fennerdrives.com/welding-kits-and-components/_/Butt-Welding-Kit/
The pliers/clamp is very helpful, and makes the three handed job a simple two handed job. The melting knife is really just a soldering iron with a large flat tip. We usually clean up the weld with a vertical belt sander, similar to what Dug mentioned with the bench grinder. A good weld is just as strong and flexible as the rest of the belt. Great article as always Dug!
I have found that the rubber spline material used to replace window screening can be used to make pulley belts. I pass strong monofilament fishing line through the hollow spline and glue it in place. This method is simple and cheap.
These people sell both smooth and textured belting in the UK, by the metre, in sizes 2-12mm diameter. they also do a 5mm hollow belt which can be joined by a press-in connector, if you don’t want to weld it.
http://www.stationaryengineparts.com/Polyurethane-Round-Belting/
Whizbo,
I came across that belt welding kit while doing a bit of research for the article. I’ve never used one. They look great — especially the pliers. I agree that they are expensive! Thanks for the sanding tip. I’m glad you enjoyed the article!
-Dug
Doug Dalgetty,
Thanks for the tip! Do you tie the monofilament into a loop, then glue the ends of the rubber spline material together around it?
-Dug
The spline that I use has a hole down the middle. I’ve used two methods. I have passed the mono all the way through the hole in the spline and then tied a knot in the mono. This leaves a small gap. I then found that simply applying “crazy glue” gel to the mono and passing it all the way through the spline works without using any knot at all. This leaves no gap and seems to sufficiently robust.
Thanks for the additional information, Doug!
-Dug
Wow, those welding kits are very expensive. I’m going to make a clamping device on my laser that will cost less than 1/20th of the Eagle clamp and to the same job. Just ordered some green belting from RS in the UK.
Michael,
They sure are. That’s one reason why watchmakers, clockmakers, and others have been using the hot knife method for ages. I’m sure we would all love to see your clamping device design when it is done!
-Dug
Just wanted to say thank you for sharing this technique. I ruined more than a couple of welds before I came across your blog. 🙂
Glad it helped, Fed!
Dug I had nothing too lose ,tried this on an old belt that broke . It was on a heat recovery unit worked great saved about $95 Thanks the boss could not belive it would work THANKS
Roger,
That’s great news! Glad it proved useful.
-Dug
Having just made an emergency repair to a belt on a robovac, I found this method to be interesting however, I think my solution was easier and without chance of changing the length of the belt. My belt was 1/8″ orange urethane and to repair it I took about 1/2″ of 26 GA solid core wire and inserted it halfway into the center of one end of the broken belt about halfway in. Then I did the same with the other half. When I was certain that the belt joined exactly as it was before and there were no twists in it, I separated the pieces a little bit, put a drop of super glue on the wire and slid them back together. When dried, I reinstalled and it’s working fine. Hope this helps someone.
Cheers