 How to Make a Ratchet Mechanism
A ratchet can be a very useful mechanism within an automaton. It can be used to keep the handle from being turned the wrong way or to divide the cycle of action into a series of small steps. This is one way to extend the duration of the performance. Let’s make a ratchet that is advanced by one step for every revolution of a crank. Check out pages 77 through 83 of Cabaret Mechanical Movement for examples of ratchets and what they can do.
 What You Will Need
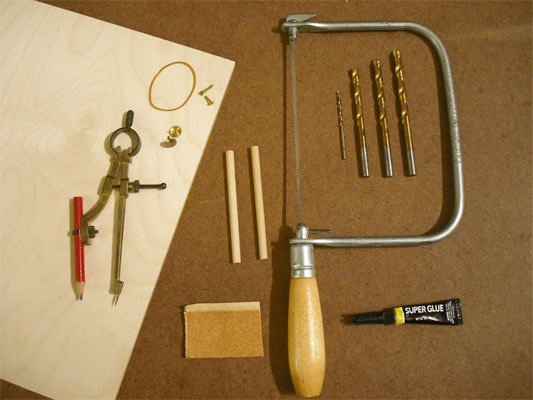
This project requires a few tools and some easy-to-find materials:
Materials
Tools
 Print Out the Pattern
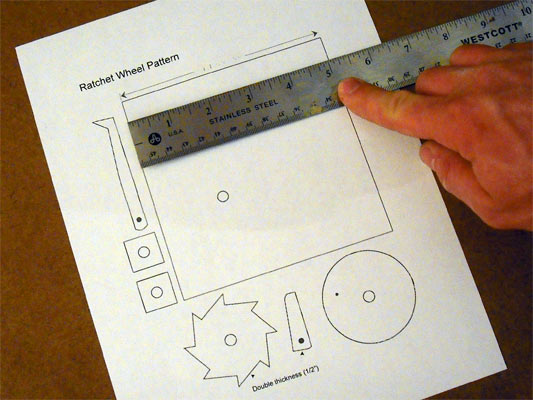
Print this pattern out at full size (i.e. 100% with no scaling by the printer). Make sure that you are printing it the ‘Portrait’ orientation. Once you’ve printed the pattern, check the width of the large square. It should be about 12.5cm / 5″ wide. If it is way off, adjust the scale in your print settings until you get a print that is the correct size.
 Cut the Ratchet Wheel and Holding Pawl
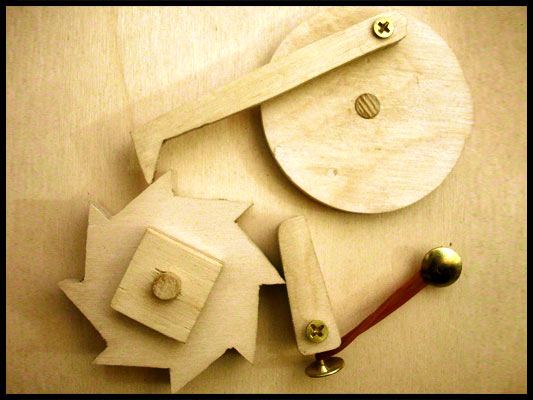
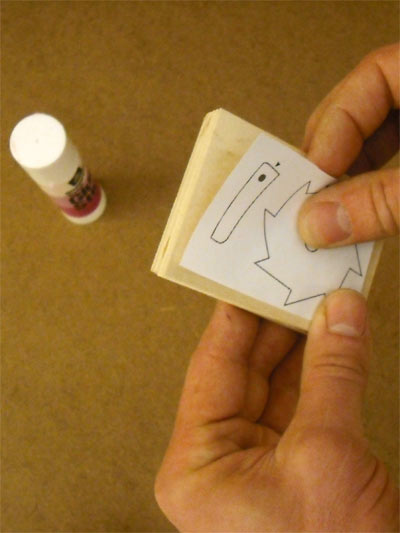
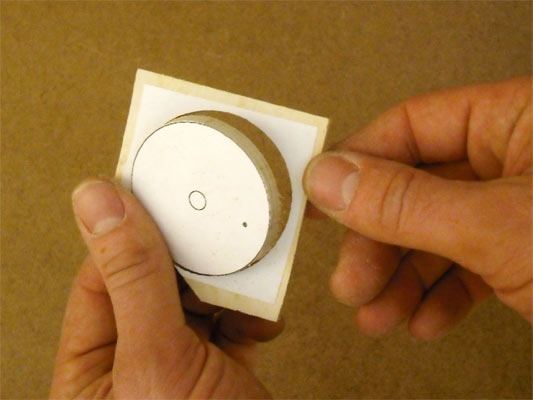
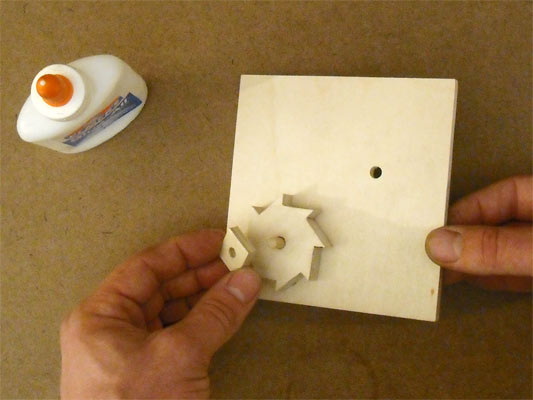
The ratchet wheel and holding pawl are made up of two stacked pieces of 1/4″ plywood. Cut two pieces of 1/4″ plywood to about 3-1/2″ by 2-1/2″ and glue them together with Super Glue or white glue. Once the glue is dry, use glue stick to adhere the section of the pattern with the ratchet wheel and holding pawl to the glued pieces of wood. Cut to the lines with a saw. Note that even though the ratchet is based on a circle, all of the cuts are straight! The hole in the center of the ratchet wheel should be 17/64″ so that it can spin freely on a 1/4″ dowel. If you only have a 1/4″ bit, don’t worry. You can sand the dowel down so that the ratchet wheel will spin on it. Drill a small hole in the bottom of the holding pawl that will allow the longer screw to spin freely.
 Cut the Driving Pawl Circle
A wooden circle driven by a hand crank will push the pawl to advance the ratchet. The circle should be about 2-1/8″ in diameter. For some methods on cutting wooden circles check out Wooden Circles for Your Automaton Projects. Regardless of how you cut the circle, make a 15/64″ hole in the center when you are done. This will provide a friction fit on the 1/4″ dowel. Again, if all you have is a 1/4″ bit, that’s fine. A little glue will hold the circle onto the dowel when the time comes. Use an awl to mark the location of the small hole that will be drilled later.
 Create the Driving Pawl
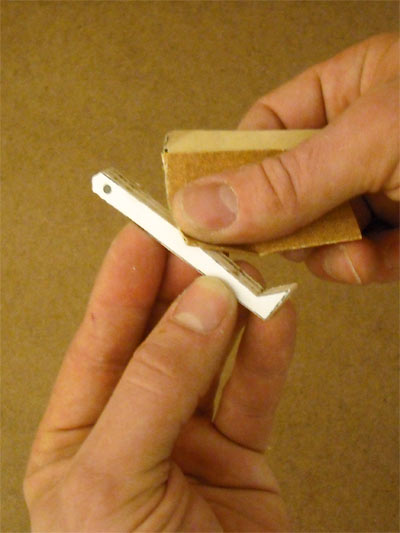
The driving pawl is an arm attached to the driving pawl circle. As the circle turns anticlockwise, the arm engages with a tooth on the ratchet wheel and pushes it forward. Cut the part using the pattern. It’s important that the pawl is tapered to be a bit thinner just before the end section that pushes the ratchet. Sand the edges smooth, paying extra attention to the underside of the pawl. Drill a small pilot hole in the spot indicated in on the pattern.
 Make the Backplate
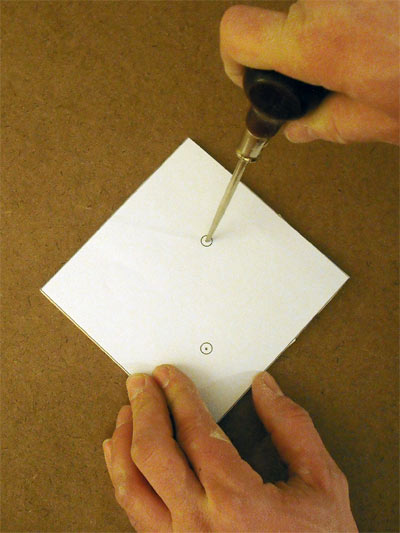
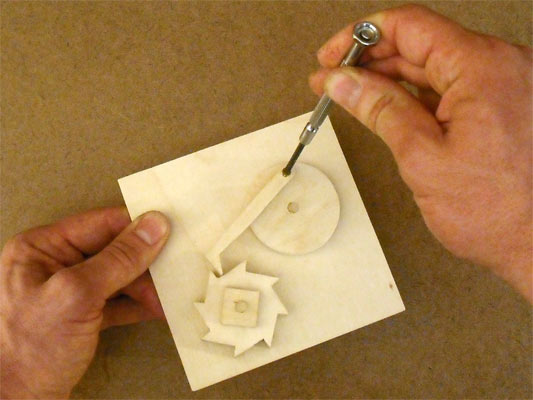
All of the parts will be mounted to a flat piece of wood called the backplate. Cut a piece of plywood to be a square 5″ by 5″. Use the printed pattern to locate where the two holes should go. The lower hole should be drilled with a 15/64″ bit, and the upper one with a 17/64″ bit. The first will create a friction fit for a 1/4″ dowel, and the second will allow a 1/4″ dowel to spin freely. Again, extra sanding or extra gluing can make up the difference if you only have a 1/4″ bit.
 Cut the Retaining Squares
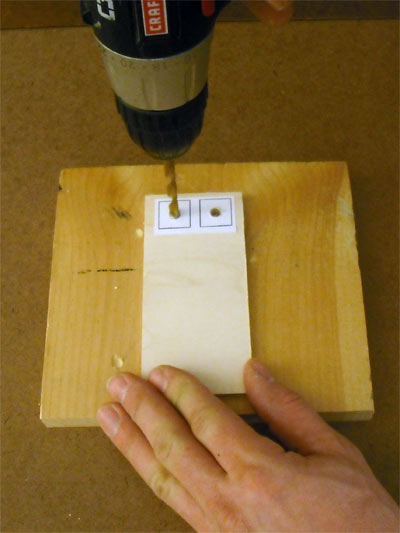
The project will require two wooden squares about 3/4″ by 3/4″. Drill a hole through the center of each one with a 15/64″ drill bit. This will allow it to be a friction fit on a 1/4″ dowel. It’s easier and safer to drill the holes in a somewhat larger piece of wood, then cut the pieces to size.
 Mount the Ratchet
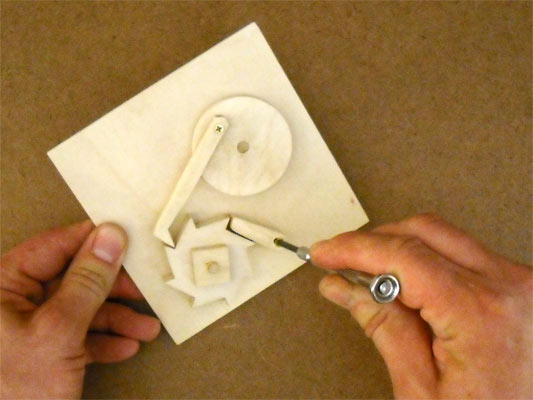
Cut a 1″ length of dowel and glue it into the lower hole in the backplate. Place the ratchet wheel on the dowel, making sure the teeth are pointing in the right direction. Finally, install a retaining square on the dowel to keep the ratchet from falling off. Check that the ratchet will spin freely on the dowel.
 Mount the Driving Pawl Circle
Glue a 1-1/2″ piece of 1/4″ dowel into the hole drilled in the driving pawl circle. Make sure that no part of the dowel sticks out past the front face of the circle. If it does, sand it flush. When the glue has dried, insert the dowel and disc into the upper hole in the backplate. Finally, press a washer on from the back side of the plate to keep the circle in place. Don’t press the washer on so tight that the wheel cannot spin easily.
 Fasten the Driving Pawl
Use the 1/2″ long screw to fasten the driving pawl to the crank circle. Make sure of two things. First, the driving pawl should rotate freely on the screw. Second, the screw must not be driven so far as to stick out the back of the driving pawl circle where it could dig into the backplate.
 Install the Holding Pawl
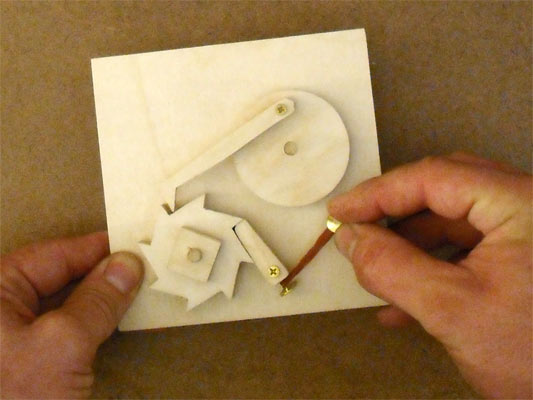
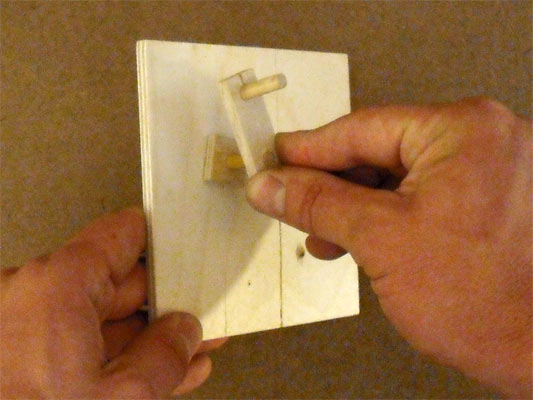
The holding pawl performs the important job of keeping the ratchet from turning the wrong direction. It is the piece that makes the distinctive clicking sound common to all ratchets. Turn the driving pawl circle anticlockwise so that the driving pawl pushes a ratchet tooth all the way forward. Without moving the ratchet, use the 3/4″ screw to fasten the holding pawl to the backplate so that it fits neatly within a notch behind one of the ratchet teeth.
 Adding the Holding Pawl Spring
The last thing to do is add an elastic band to act as a spring. Press a tack into the base of the holding pawl. Loop one end of an elastic band over the tack and pull the other end until the elastic pulls the pawl against the ratchet wheel. Press the second tack into the backplate to keep the elastic taught.
 Cranking it up a Notch
Add a simple crank and handle to the dowel sticking out of the backplate. When the crank is turned, the driving pawl pushes the ratchet wheel forward and the holding pawl clicks into a new notch. The driving pawl then drags backward over the ratchet until the crank comes around and the process is repeated. Add a base to create a nice little working model!
 Dug’s Automata Tips, Techniques and Tricks
A quarterly column by automaton-maker and enthusiast Dug North
Copyright 2013 Dug North
Warning: The topics covered in this column include the use of tools and materials that have the potential to cause damage to property and/or bodily injury. Your safety is important and it is your sole responsibility. Always read and follow the safety instructions that come with tools and materials you use. Wear safety glasses, use guards and other forms of safety equipment, follow safety precautions, and use good judgment. Seek the guidance of experienced outside sources whenever required.
Materials
 Baltic birch plywood: Amazon UK – Amazon US
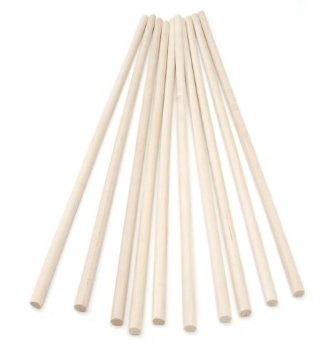 Unfinished dowel rods, 1/4-Inch: Amazon UK – Amazon US
 Super Glue Ultra Gel adhesive: Amazon UK – Amazon US
Tools
 Hobby tool set: Amazon UK – Amazon US
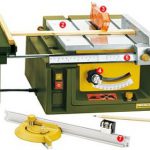 Miniature table saw: Amazon UK – Amazon US
 Wood handled scratch awl: Amazon UK – Amazon US
peter says:
Hi
I made the ratchet gear acording to your drawing. My problem is where to locate the holding pawl to the back support. Can you help?
Peter jumpey
Dug North says:
Hi Peter,
What you want to do is attach both the ratchet and driving pawl assembly to the backplate. Then, turn the driving pawl so that it advances a tooth on the ratchet as far forward as it will go. Now, don’t move a thing. Nest the holding pawl into a space behind a ratchet tooth, perhaps with a tiny gap between its end and the face of the ratchet tooth with which it is nested. Mark this location and install the holding pawl there. This should ensure that the driving pawl will advance the ratchet far enough for the holding pawl to snap into place behind a tooth.
You may find that you need to sand a bit off of the front edge of the holding pawl, if it still doesn’t snap into place consistently. A slightly rounded leading edge on the holding pawl can be helpful.
I hope this helps!
-Dug
Catherine couturier says:
So happy!!
How can I connect it to workning figurers?
http://instagram.com/p/fqbXCotfrC/
Dug North says:
Hi Catherine,
Well done!
To make use of the ratchet, consider making a box (see Tips article No. 7: https://cabaret.co.uk/dugs-automata-tips-techniques-and-tricks-no-7/). Extend the axle that runs through the ratchet from one side of the box to the other. In this configuration, cam followers can make contact with cams placed on that axle and animate figures above.
Study this classic automaton by Paul Spooner for some inspiration: https://cabaret.co.uk/rias-ark-exhibition-japan/
-Dug